The following stages in the ArcMap display picture thumb of photogeotagging using GPicSync results. This stage also does not include how to display the Add-in Convert GPSFile to SHP toArcToolbox, you can read through previous posts here. This stagealso does not include how to process the photo in GPicSync to geta KML file, I assume you already understand it. If not, please see the section Getting Started with GPicSync.
Perform conversion of KML to SHP using the Add-in ConvertGPSFile to SHP

- Make sure the Feature Type is selected POINT.
Show shapefile as a layer in the TOC, and open its attribute.Column Name is the name of the file photo, while column descr is the html script to display the photo. We do not need content from thedescr column, we'll change the photo file name contained in theThumbs folder GPicSync outcome of the process. I click theright-descr column, select Field Calculator. Fill the form with:"thumb_" & [NAME] and then click OK.
- The results of the above process as shown in the picture below.

- To make the picture thumb in ArcMap, we will take advantage ofHTML features Popup. Previously you had to do the settings of the Layer Properties. The trick, right-click the layer (shp conversion results from kml), select Properties. Move to HTML Popup tab, thenselect As a URL prefix * with replacing his suit with the Thumbsfolder location, and determining its field with descr according to thecolumn name that has been done on three previous stages.

 At this stage has been completed, click the Point to display it usingHTML Popup icon located on the Tools toolbar to generate the display as shown at the top.
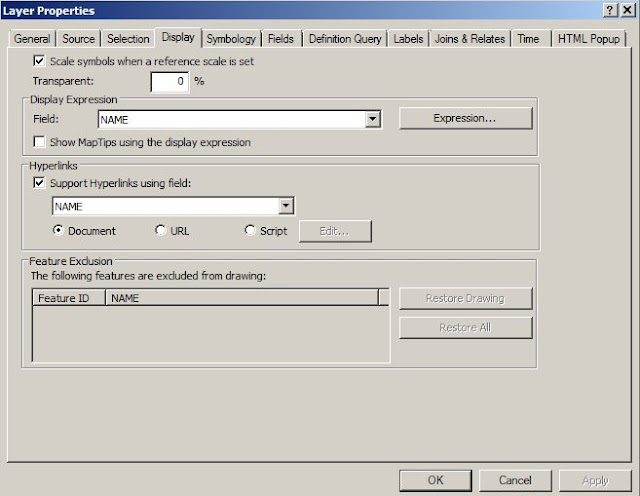
If you ask, how to display the original photo (not the result ofresizing)? It's easy, you can use the Hyperlink feature (the icon withthe lightning symbol on the icon HTML Popup) by first doing the settings of the Layer Properties. The trick, right-click the layer (shpconversion results from kml), select Properties. Move to the Displaytab, then select Support Hyperlinks using field. Select the DocumentName column (see picture below), and then click OK.